Categories
Calendars
Guides
Reviews
Archive
Gallery
Articles
Ask Our Gardening Expert
Growing Blackcurrants
Propagating
Blackcurrant Bushes
The
time to propagate the bushes is when the foliage has stopped growing and
is beginning to turn brown or falling off. A good time is
mid-October
although a couple of weeks later is almost as good. Take cuttings from healthy bushes only - ignore bushes with any signs of
disease.
Select
a healthy looking stem of ripened (brown not green wood) and cut
a 25cm (10in) length.
The cut
should be made just below a bud. Pull off all the leaves from
the stem being careful not to remove the stem. The result should
look like the picture on the right (click picture to enlarge).
Place the cuttings into the trench making sure that at least two buds will
remain above the soil surface and that there are four or more
buds below the surface. Space the cuttings 20cm (8in) apart
(click picture to enlarge).
Fill
in around the cuttings with the removed soil, being careful not
to damage the buds below or above the soil. Gently firm the soil
down around the cutting with your foot.
Water the soil well. It is a good idea to mulch around the cuttings with
well-rotted compost to conserve water. In the picture on the
right (click to enlarge), old carpets are used a mulch. Leave the cuttings in the ground until October next year
then dig them up with as much of their root ball intact as possible.
Transplant them to their final positions as if they were bought from a
nursery (click
here for planting instructions).
Hardwood cuttings are a great way to create more blackcurrant bushes, because it's easy,
quick and has a very high chance of success. Additionally, it does not
require any protection or warmth. Let GardenAction guide you through
this process with pictures and sound advice.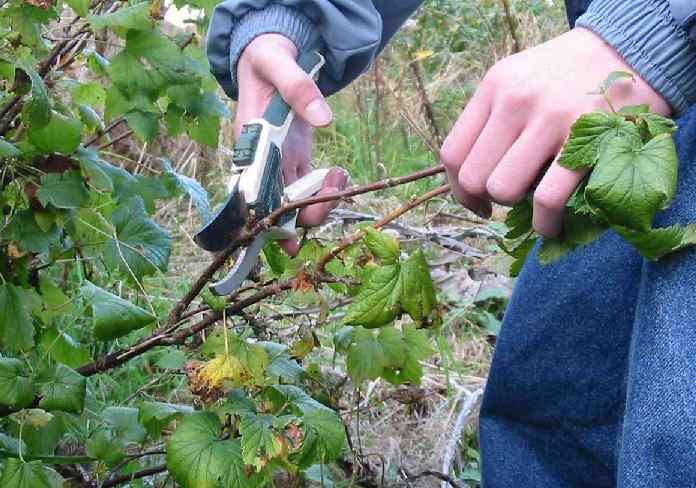
Click to enlarge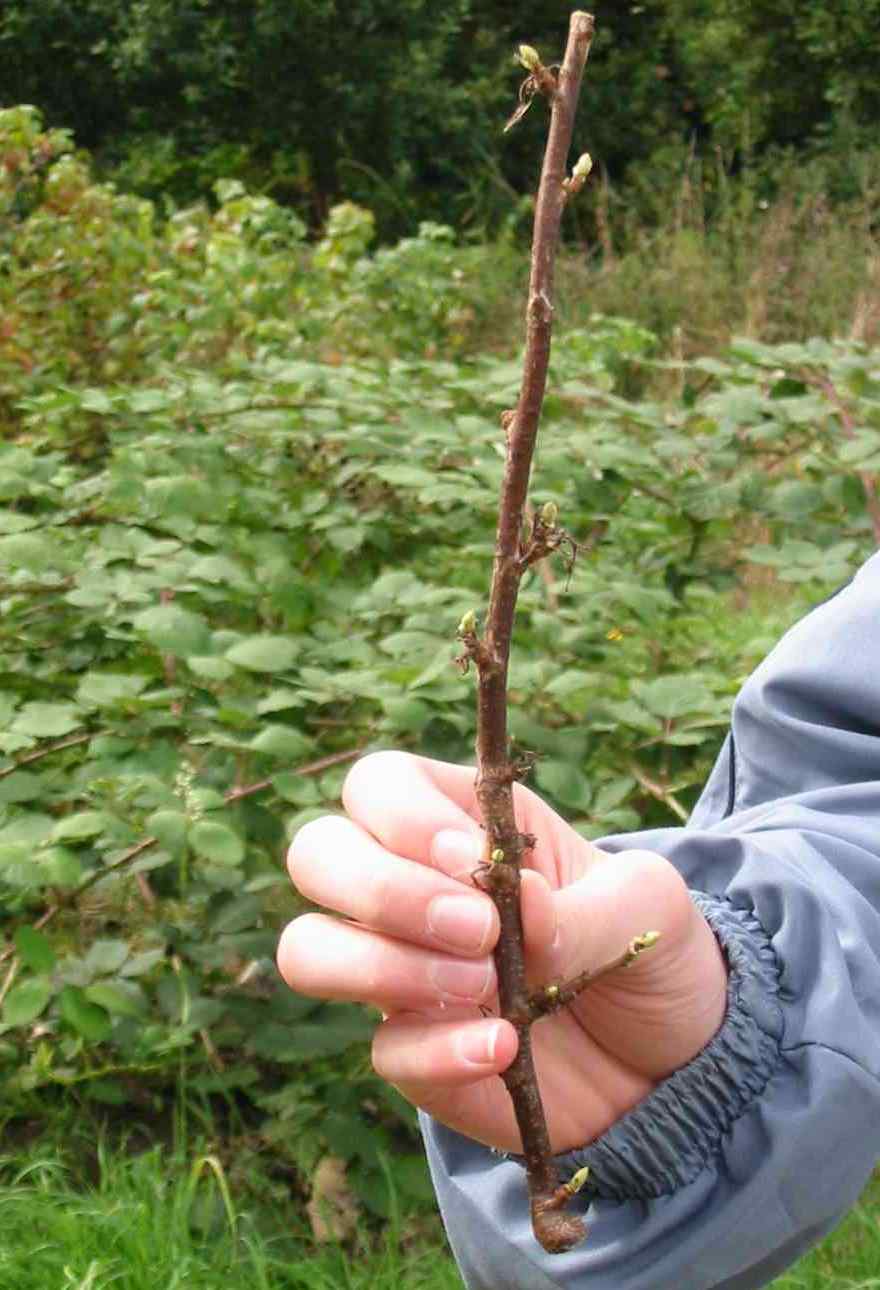
Click to enlarge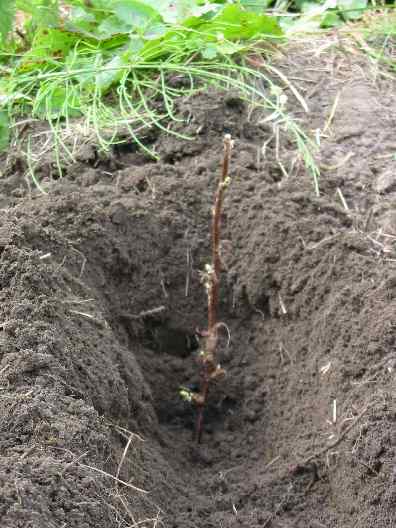
Click to enlarge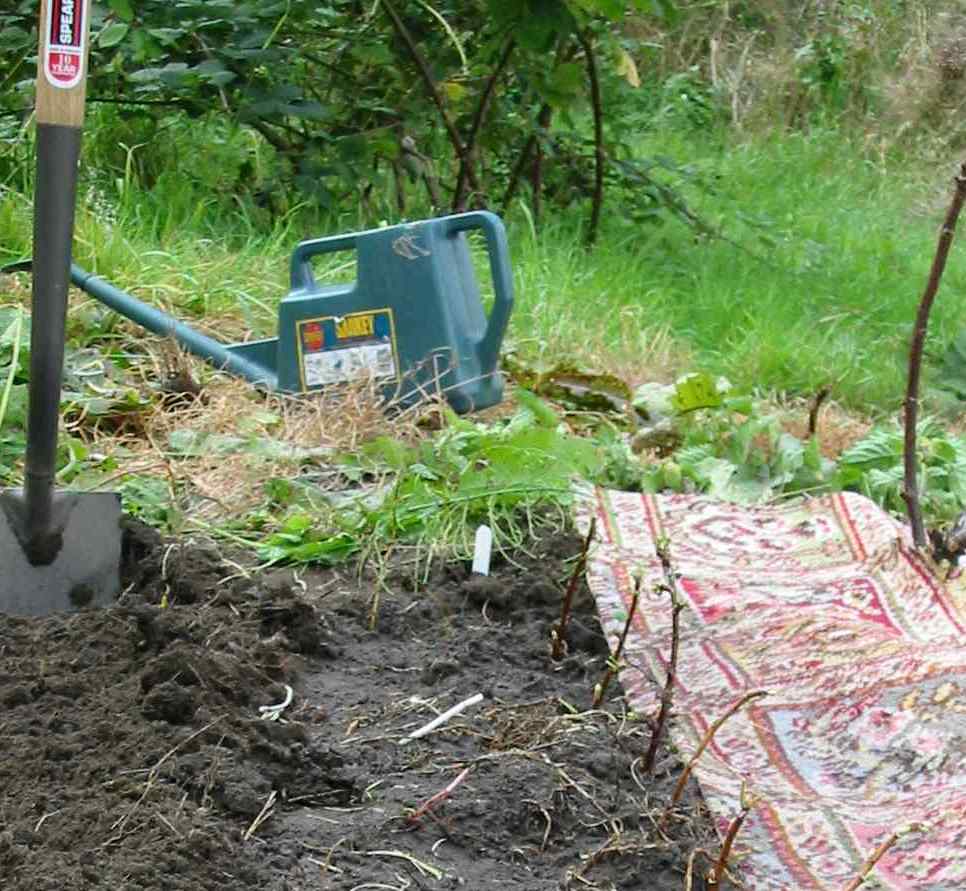
Click to enlarge
Name: Greg Hoffman
E-mail: Private
Date posted: July 17, 2011 - 03:34 pm
Message: The instructions say take the cutting in october when leaves start to fall off but the pictures you have show the plant full of green leaves and in the case of the example cutting, with buds emerging. I am confused, is this procedure to be done in spring at budbreak? Thanks.
Name: Paul Calcutt
E-mail: newlife777@hotmail.co.uk
Date posted: July 06, 2011 - 06:03 am
Message: Hi
I am a currant growing newbie...I planted a blackcurrant bush in Mid May and totally forgot to cut it right back. At the moment it looks rather sad and some of the leaves are turning yellow, should I prune it back now or is it too late in the season?
Name: Ron Woodman
E-mail: randr.berryfarm@gmail.com
Date posted: December 24, 2010 - 04:27 am
Message: Good day and merry Christmas to you.
Is it advisable to propagate blackcurrant bushes from hardwood cuttings after all the leaves have fallen? Is there a time after the leaves fall off that it is not advisable to do so?
Thanks
Ron