Categories
Calendars
Guides
Reviews
Archive
Gallery
Articles
Ask Our Gardening Expert
How to Grow Herbs in Containers
Your herb container weather dates have not been set. They have defaulted to medium settings.
Click here to set the weather dates to your area of the UK or USA.

Many herbs are dual purpose, they provide flavour for your cooking and at the same
time have decorative flowers or foliage. We started from scratch and took pictures as we
went through the process. that way you know the advice you are given here comes from
real practical experience.
The containers can be any size (10cm / 4in upwards), and of course you can have as
many as you want. It's also not really necessary to buy all the pots at the start, more
containers can be added as your interest in herbs grows. Our aim at the start of this
project was to have pots large enough for about seven herbs. If your herb container doesn't have any drainage holes in it then the first step is
to make four or five smallish holes in the base. Don't make the holes to large, that
would allow the compost to leak out each time the container was watered. Before you fill your container, think carefully where its final position will be.
It's often best to site the container near to a house door. This will enable you to
easily collect the herbs when you need them for cooking. The other factor to consider is
sunlight levels. Most herbs thrive in full sun for as long as possible so site the
container in full sun.
Often, the drainage holes at the base of a container do not drain as quickly
as you would want. With this in mind, fill the base of the herb container with
small stones, crocks or clean grit to a depth of about 3cm / 1in.
The stones / grit will allow excess water to drain through the soil / compost
in the pot and out through the drainage holes in the base.
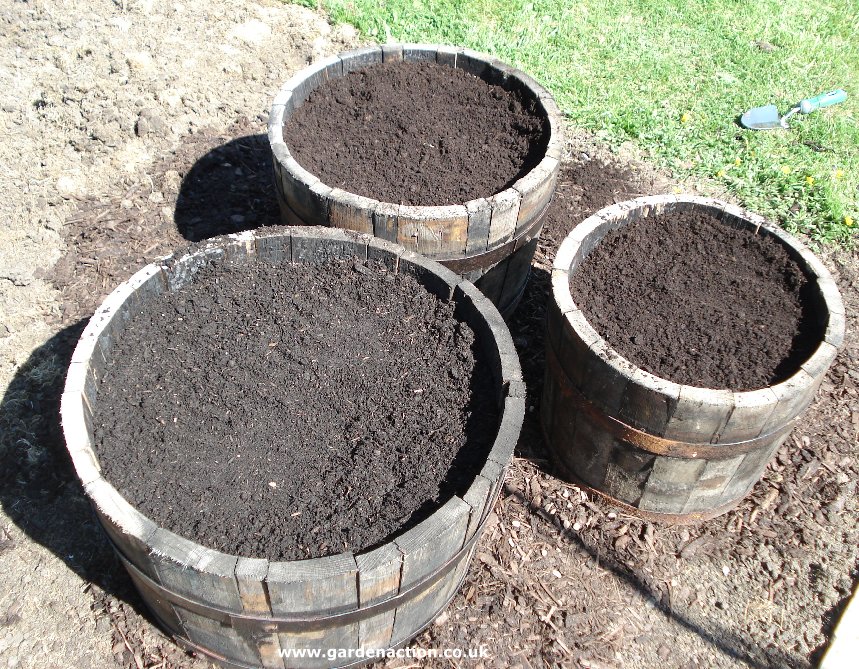
If you are unable to find any compost / John Innes premixed then simply add
three parts multipurpose compost to one part John Innes. Fill the containers
with the compost mix to just under the top of the container, a little less if
you will be adding a final layer of gravel (see towards end of this article). As you are filling
up the container, crumble any lumps of compost as you go.
At all costs avoid planting strong growing herbs in the same container as
less vigorous herbs. Mint, lemon balm and sage should be planted in containers
by themselves. During our visit to the National Herb Centre we asked them which herbs to select for
growing in containers with no specialist knowledge. Their suggestions were:
Chives Coriander Dill Marjoram /
Oregano Parsley Sage Slow growing varieties of
rosemary were also recommended.
Having bought your herbs, planting them in the filled container is easy. Scoop out a
hole in the compost approximately the same size as the potted herb. Tip out the herb
from the pot and
place it in the hole. It should be planted to the same depth as grown in the pot. Gently
firm down the surrounding soil and water in well.
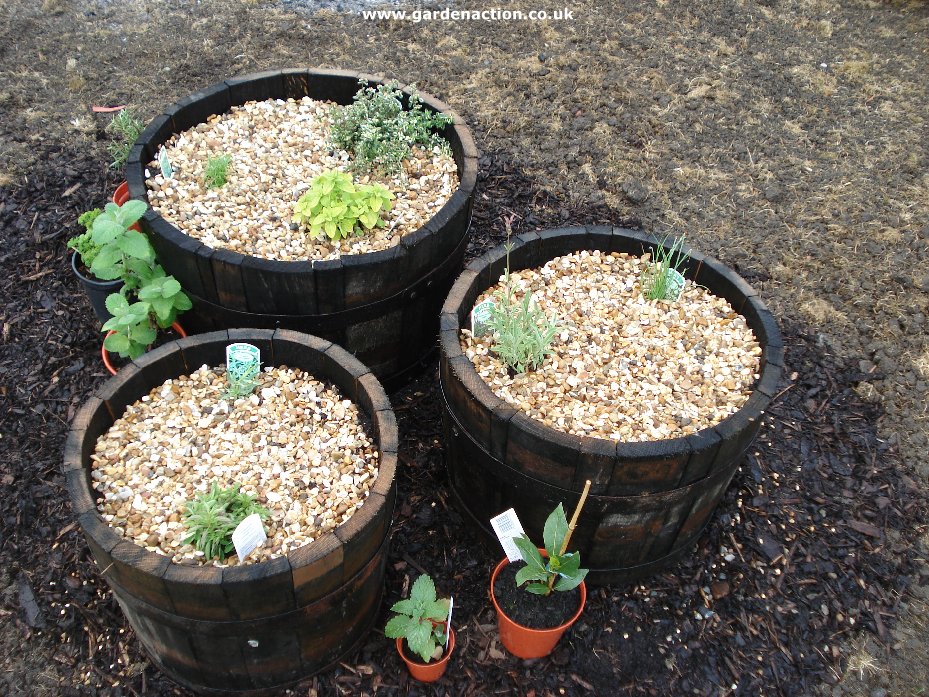
That's about as much as you need to do to get your container herb garden off to a good start. We
added around 2cm / �in layer of gravel over the top of the compost. Not only does this
make the containers look more attractive but it will also help retain moisture in warm
weather, reducing the need for watering. Finally we spread a 3cm / 1in layer of chipped
bark round the containers. This is purely for looks although if the containers are place
directly on soil, then it will stop your feet picking up soil when you care for your
herbs. To retain the chipped bark in place, we placed a low border round the area. Click
the picture above to see an enlarged version with our final touches.How to Grow Herbs in Containers
Grow Herbs in Containers - Selecting a Container
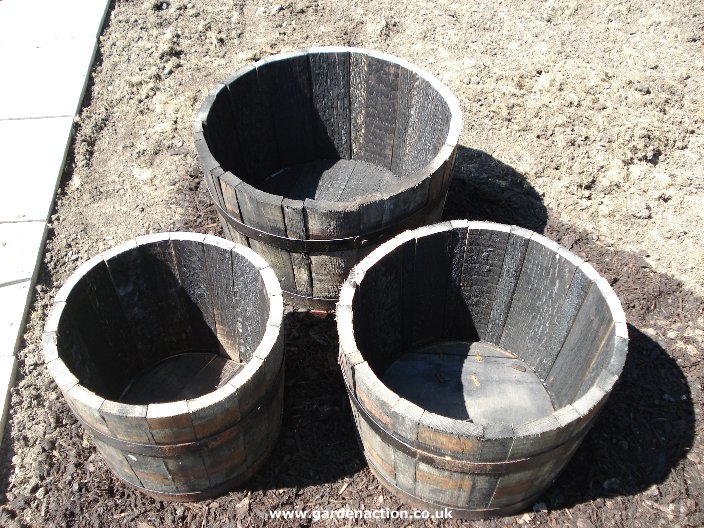 For this article we chose to grow our herbs in three wood barrels. One
large, one medium and one small. But there is a huge variety of different pots
which can be used. From basic plastic ones through to terracotta and metal
containers. The only "must have" for any herb container is that it must have
holes in the bottom for water drainage. All herbs hate growing in water-logged
conditions. Many herbs prefer a period where little water is present.
For this article we chose to grow our herbs in three wood barrels. One
large, one medium and one small. But there is a huge variety of different pots
which can be used. From basic plastic ones through to terracotta and metal
containers. The only "must have" for any herb container is that it must have
holes in the bottom for water drainage. All herbs hate growing in water-logged
conditions. Many herbs prefer a period where little water is present.
Grow Herbs in Containers - Filling the Container

 Gardeners often ask which soil can be used, or is best, to fill a herb
container. For a definitive answer we took a trip down to the National Herb
Centre in Warmington and asked them that question. They recommended, and use
themselves, good quality general purpose potting compost which has John Innes
compost added to it.
Gardeners often ask which soil can be used, or is best, to fill a herb
container. For a definitive answer we took a trip down to the National Herb
Centre in Warmington and asked them that question. They recommended, and use
themselves, good quality general purpose potting compost which has John Innes
compost added to it.
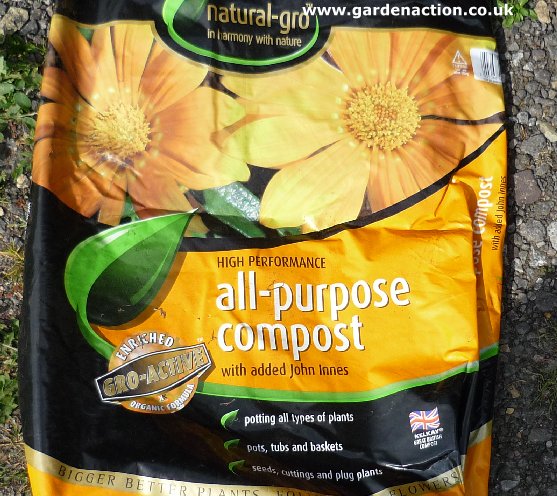
The picture on the left (click to enlarge it) shows the compost used at the
National Centre. They are the herb experts so we recommend you use the same.
Grow Herbs in Containers - Planting the Herbs
 Your choice of herbs for the containers will depend on several factors. Is
the primary purpose decorative or for cooking? Do you want one larger herb per
container or two or three smaller ones.
Your choice of herbs for the containers will depend on several factors. Is
the primary purpose decorative or for cooking? Do you want one larger herb per
container or two or three smaller ones.
Name: jim@GardenAction
E-mail: Private
Date posted: October 20, 2011 - 04:13 am
Message: Hello Linda
You can water it a little, but why bother? Make a few holes with a sharp tool and you will not need to worry about waterlogging.
Name: linda
E-mail: Private
Date posted: October 20, 2011 - 03:38 am
Message: k well i need to ask u i have a pot adn i;m growing parsley and it doesn't have any holes so i figured i should just water slightly less and then when it's starting to get dryish then i should just water it do u think i could do this
Name: chris
E-mail: syl-chris@hotmail.com
Date posted: July 17, 2011 - 12:07 pm
Message: I live in Spain my basil plants keep dying the leaves get all wrinkly and go yellowish white HELP!
Name: Chris
E-mail: hallamchristine@hotmail.com
Date posted: June 13, 2011 - 02:51 pm
Message: My rosemary plant is in full sun. The needles on it are turning brown. What is the cause and how can I cure it. Also, do I remove the flowers?
Thank you for your help
Name: Chandraman Gurung
E-mail: chandrabal55@gmail.com
Date posted: May 12, 2011 - 03:16 am
Message: I am interested to make gardening more interesting and herb product.
I am interested to make green tea but have no idea which plants are more used in makeing green tea.
Name: kevin
E-mail: kawilliams4@verizon.net
Date posted: January 09, 2011 - 10:45 am
Message: how do I handle pooted chives in the winter? do I move them indoors? should they be left outdoors?
Name: NAINA
E-mail: 247beezyb@live.com
Date posted: November 19, 2010 - 12:34 pm
Message: I have a question about my basil plant which I have indoors ...
The basil plant is getting dropy as the weather is getting colder and darker and some of the other plants leaves has died ...
So I have cut the stem but left some of it in with the roots attached to the earth in side the pot ..
Do you think that the stem will grow again?
Do you think the basil what is left of my last plant will survive the winter in the house?
I would be very gratefull if you can answer my question thank you.
Name: FAIZA
E-mail: faiza2410@live.co.uk
Date posted: November 03, 2010 - 06:27 am
Message: I do not know much about gardening my rossemary plant leavesare turning brown can you guide me