Categories
Calendars
Guides
Reviews
Archive
Gallery
Articles
Ask Our Gardening Expert
Building a Concrete Pond
The disadvantage, of course, is that rather more skill is needed but is still within the range of a determined amateur who follows the correct procedure. This section is an outline of the process and more detailed research needs to be carried out before commencing the project.
The excavation must be at least 15 cm greater in size than needed for a flexible liner pond. A much greater quantity of material to be moved and disposed of. Some calculations can provide an estimate and a place can be found for the earth and stones. Some creativity can be used to take up the material, raised banks perhaps, or another garden feature. The nearer the disposal site to the pond site, the easier and therefore, the cheaper it will be. A few hours work with a hired digger and a capable driver saves many hours of work and may be small consideration when the total cost is taken into account. Always provide the driver with clear, written instructions and diagrams, if possible, so that there is no confusion. Have all the materials in the quantities needed and the tools ready to use on the site. Choose a time in summer, when the ground is drier and concrete sets more quickly.
An excavation taking into account the needs of marginal plants and fish
Line the hole with plastic sheeting and spread 5cm of concrete over the base. For extra strength, over this, place galvanised wire mesh and another 5cm layer of concrete. Leave some mesh exposed at the edges to link with the sides later. Leave until the next day to harden.
Formwork and reinforcing in place
After a few days, the pond can be washed down with dilute hydrochloric acid, or even vinegar, the alkalinity of the lime in the concrete may harm fish and plants. Fill the pool and check the pH level of the water over some days with a swimming pool test kit or some pH indicator test paper. If the water is too alkaline, add a little vinegar, too acid, and then add a little lime. The ideal level is pH 7, when it is safe to introduce plants, the after a few weeks, fish.
Raised ponds require strong walls
Mark the shape with a string and pegs or ground marker and dig footings 10-15cm deep and 30-40cm wide. Fill the footings with concrete, taking care that they are level. Remove sharp stones from the base, cover with sand and a layer of polyester matting, old carpet works as well.
Concrete has a considerable number of advantages over other materials, especially when building formal ponds. There is no limit on size and shape and they are extremely durable and rigid.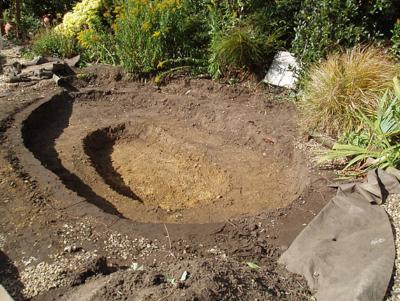
Build the wooden boxing or formwork about 10cm from the sides of the hole and place wire mesh between the formwork and the soil sides. If a shelf is needed, the formwork need only be a little higher than the shelf and a second level of formwork is used. Fill the sides with concrete and leave for a further two days to harden. The margin of the pond can dug out and filled with gravel in preparation for edging.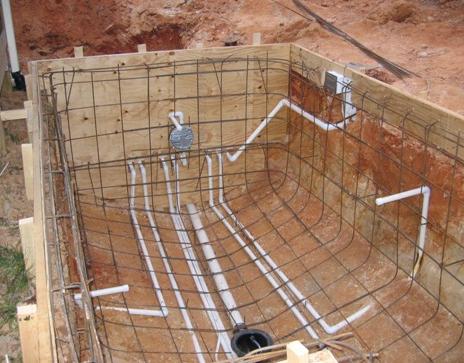
Raised pools must have walls strong enough to withstand the pressure of the water. For fish, the water must be at least 45 cm deep so a considerable weight has to be retained by the building work. Professional help may be needed. As with house walls, build two courses of brick or block bonded with wall ties. A flexible liner will be needed. 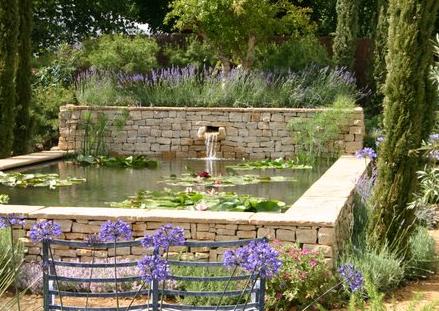
The walls may be built so that the liner is installed and the top courses are added later, with the liner passing between the inner and outer walls and overlapping the top. No liner is visible and a more attractive edge is seen above the water.